5 levels of Azure App Service Security
How to secure Azure Functions and Web APIs with increasing effort

I am a cloud-native developer at the international university of applied sciences, working mostly with Microsoft technology
Introduction - what is security?
Security in an API deployment aims to restrict access to your data. To discourage the abuse of an API and limit the pool of people with certain degrees of access (Read and Write for example) there are multiple options given on the Azure App Service Platform, with varying levels of safety and complexity. Not all options fit all use cases, so here are some to choose from, with their advantages and pitfalls
No security
For a limited number of use cases, it is legit to not use an inherent security measure besides the built-in PaaS security that Azure provides automatically. This could be delivering data to anonymous clients, for example when distributing open data while setting the requirements of access as low as possible. For most use cases, however, some kind of access control is required.
Advantages
Very easy to implement
Does not require a list of users or keys
Good for distributing publicly available data
Pitfalls
Might still require a DDoS protection layer, since its a public API
Might still require rate limiting to prevent abuse
Here is an example with an Azure Function:
Note how the authentication is set to "Anonymous".
Function or Admin Key
The default security of Azure Function is called "Function Security", and it requires a client to send a static string along with every request. This "passcode" can be unique for a specific function or unique to the whole function deployment (admin security). There is no pooling of function or admin security passcodes, and every client needs to have the same passcode at the same time. When it's changed, every client needs to change their passcode as well. This is only authorization, not authentication. For ASP.NET API projects, there is no out-of-the-box feature like this and needs to be implemented manually or using a third-party extension.
Advantages
Provides a basic authorization with very little effort
Keys can be changed with a web browser in the Azure portal
Pitfalls
Does not authenticate clients
Does not distinguish between multiple keys, so no layered access is possible
Since the keys are static, they can be lost in multiple ways
They can stay in the browser history as a query parameter
They can be checked into a source control system
A proxy might read the URL with the key as query parameter
Every communication of the key after changing it with every client might expose the new key
Once a key is lost and needs to be rotated, every client loses access unless they receive and implement the new key
This is an example on how to use function security:
And here is where it is set and rotated in the azure portal:
(insert image here)
Authentication enabled
Azure App Services have an "Authentication" tab, which is basically an on-off switch. This is how the tab looks like at the moment:
(insert image here)
What this does is creating an Application Registration in Azure AD. You can also choose an existing App Registration if you know what you are doing. After switching "Authentication" on Azure will not allow any clients to communicate UNLESS they have a valid Token for the App registration created/chosen earlier. The concept behind this is called "OAUTH" and, simplified, it says "this app registration is the bouncer to your API". Only those who can show a valid ticket to the bouncer can talk to your API afterwards. And who gives out tickets? Azure Active Directory. This is an example call to the Azure Active Directory Endpoint for getting a "ticket" (token):
In order to request a token from Azure AD, the client needs to be authenticated towards Azure AD as well. This can be done by using another App registration with a clientID and a Secret, or by utilizing Managed Identities.
An Example of a call to get a Token:
POST https://login.microsoftonline.com/<your TenantID>/oauth2/v2.0/token

Body x-www-form-urlencoded:
client_id: <clientID of ClientApp>
scope: <scope of server app, see below>
client_secret: <secret of ClientApp>
grant_type: client_credentials
To enable a scope for the ServerApp, click on "Expose an API" in the ServerApp in AzureAD and click on "Add Scope". You will be prompted to add a API URI. Choose one and click OK.
A token looks like this
And needs to be included in the authentication header as Bearer token. Here is a code that uses HTTPClient to do that:
In this one click basic configuration this allows everyone who can get a token from your Azure AD to have access to the API, limiting access to internal clients. To limit this further to specific internal clients, see the "Azure Roles" part.
Advantages
With one click you limit access to internal users only
Can be further limited to specific app registrations
By using OAUTH, no key exists that could be lost
Security is managed entirely by administration
HttpContext exposes more information on who is calling, adding Authentication as well as Authorization options
Pitfalls
Greatly increases the effort for clients to access your API
If you have a bad actor present in your organization with an app registration, they have access
Service Principal Selection with ARM Templates
A rather unknown option to give access to an API is by direct service principal selection. This can be handy when scripting access of multiple Managed Identites to an API. You can change the ARM Template for every API or Function App and set only the "allowedServicePrincipals", which will then be applied and used by the App Service automatically.
To do this manually, theese are the easiest steps i have found. Since ARM Templates are originally made for automation, i will make another blog post on that. Here are the steps to archive it without setting up a deployment pipeline:
Assuming that your Azure account has owner or contributor rights to the web app you want to set an access whitelist on, open the Azure CLI from the Azure Website and type this:
(Get-AzAccessToken -ResourceUrl 'https://management.azure.com').Token
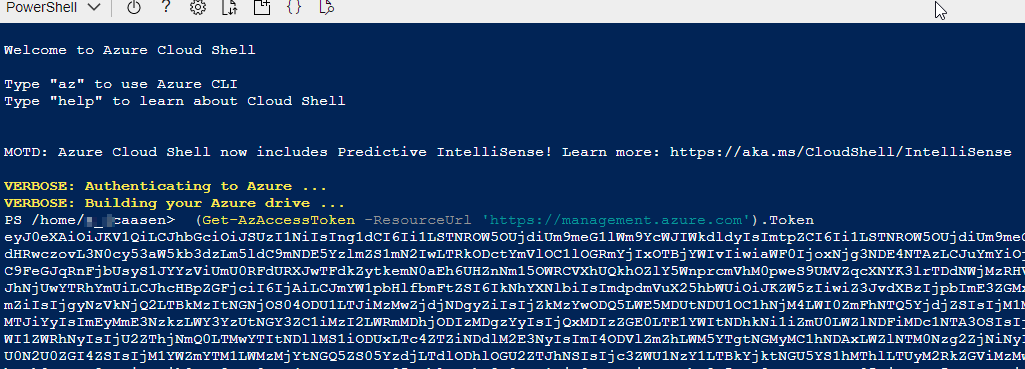
This gives you a bearer token, which we will need to make the REST calls to the Azure Resource manager.
Copy the token (starting with "ey...") and open your favorite REST client, like Postman.
Next, we need to know the URL to the resource we want to secure. This URL looks like this:
https://management.azure.com/subscriptions/{subscription id}/resourceGroups/{Resource Group Name}/providers/Microsoft.Web/sites/{Name of WebApp or Function}/config/authsettingsV2?api-version=2022-03-01
You will find the Subscription ID when clicking on the resource group that holds the Function you want to secure:

"Resource Group Name" and "Name of WebApp or Function" are the human readable names you see on the top left when clicking the resource group or the WebApp.
After you have crafted the URL you can paste it into a REST client with a "GET" Method.
As Authorization: use Bearer and the token you copied from Azure CLI
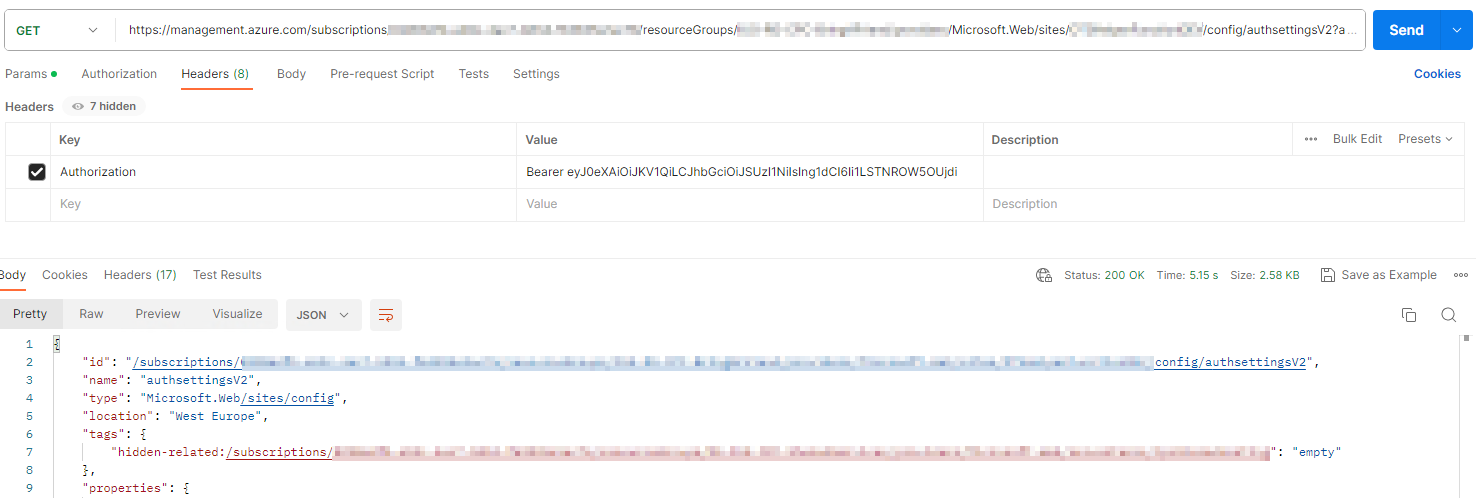
When running the GET, you should get a long JSON.
The most interesting part right now is "validation.defaultAuthorizationPolicy.allowedPrincipals"

Yours is probably empty right now.
Now take the whole JSON from the GET request and edit the "identites" with the ObjectIDs of your Enterprise Applications. For example, when activating "Managed Identities" on another service, that service gets an Enterprise Application, whose ObjectID (not ApplicationID) you need to add here.
After making the change to the template, do a "PUT" instead of a "GET" to the same URL and add the edited JSON in the PUT Body.
When a 200 OK is returned your WebApp should only be accessible from the whitelist apps you specified.
Advantages
Can be included in existing ARM deployments
Can be used without using ARM deployments
Can be automated with PowerShell or REST
Limits the HTTP Access to the API to a whitelist of Service Principals
Can be done by administrators or developers
Pitfalls
Is hard to monitor, there is no UI anywhere showing the whitelist
Requires scripting every time the list of approved Service Principals changes
Relatively unknown, therefore requires extensive documentation for new project members
Does not manage fine-grained access for specific roles. You either have all the access or none of the access
Role Assignments
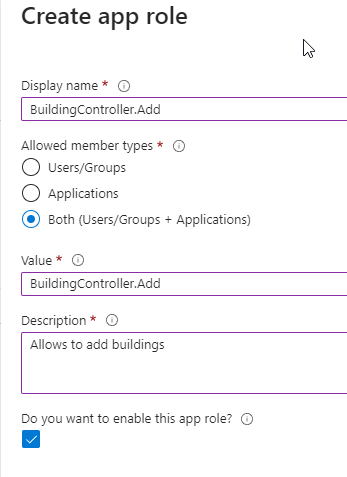
Azure AD provides the "Assignment Required" option, which is set on the App Registration made or set by the Authentication Tab. This requires the client App Registration to have an assigned role with the API App Registration. Roles can be something like "API.ReadData". You can learn more theory about App Roles here.
In general, App Roles are a fine grained option to give different access rights to different Clients. One client could be able to perform reads in one controller and write in another. Role assignments make this possible.
You can define roles in the "App Roles" Tab of an Application Registration:

Here you can work as detailed as you want with your API
After defining app roles on the API App Registration, you have to apply those roles to the Client app.
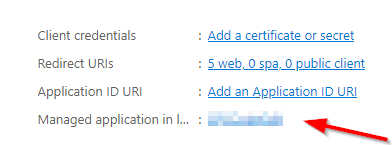
To allow Client Apps to have a Role, and therefore have specific oportunities in the API, you have to go to the coresponding Enterprise Application of the App Registration. You can do this by going back to the "Overview" Page of the Application Registration and clicking the Link behind "Managed application in local directory".
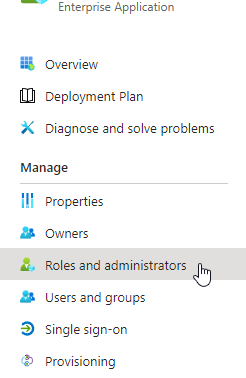
Now you have the "Roles and administrators" Tab.
Unfortunately, Microsoft still does not support adding other Enterprise Applications to a Role with the UI. You have 2 options: a slightly messy one and one with more effort.
The slightly messy option is to create an Azure Group, add the Enterprise Application to the Azure Group, and then assign the Group to a role in the "Roles and Administrators" Tab. This adds the requirement to not only control the assigned roles, but also to control who is added to the group as well, adding another possible vulnerability attackers might exploit to get more API rights.
Update: this does not seem to work anymore. I don't know if it's temporary or Microsoft removed this feature from Azure AD.
The other option is to use Role Assignments in Microsoft Graph.
A sample call to graph looks like this:
1) Find App Role ID:
GET https://graph.microsoft.com/v1.0/servicePrincipals/<Object-ID of Server Enterprise App>/appRoles

2) Set AppRoleAssignment:
POST https://graph.microsoft.com/v1.0/servicePrincipals/<Object-ID of Client Enterprise App>/appRoleAssignments
Body:
{
    "principalId": "<Object-ID of Client Enterprise App>",
    "resourceId": "<Object-ID of Server Enterprise App>",
    "appRoleId": "<GUID of Role from Step 1>"
}
You need "Application.ReadWrite.All" to perform this.
After assigning a role, you can review the assigned role of a Client Enterprise App in its "Permissions" Tab.
Now having a role does not grant or limit your access, the code needs to reflect this as well.
To check the Bearer Token Roles, you can use this general code:
public static bool HasRole(string bearerTokenValue, string role)
        {
             bearerTokenValue= bearerTokenValue.Replace("Bearer ", string.Empty);
            var tokenHandler = new JwtSecurityTokenHandler();
            var decodedToken = tokenHandler.ReadJwtToken(jwtToken);
            var claims = decodedToken.Claims.ToList();

            var roles = claims.Where(c => c.Type == "roles").Select(c => c.Value).ToList();
            return roles.Any(r => r == role);
        }
There are built-in methods in ASP.NET to archive this check as well by annotating a Controller or Method, but it requires some fiddling.
Bonus: APIM and Network Security
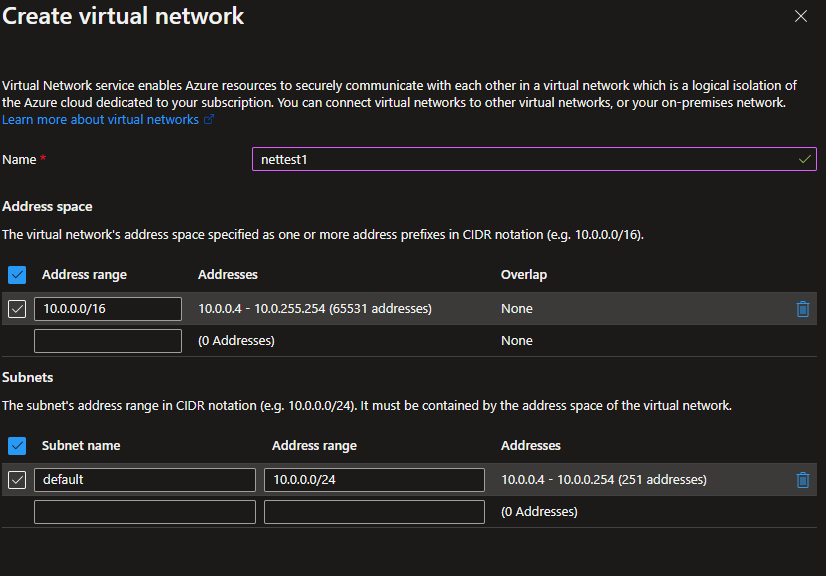
Instead of exposing your service to the internet at all, you could also use the Azure API Management Service, and use private Networking in the Cloud to give access to your service only via APIM.
This, however, does not work with serverless functions. You need at least an App Service with Basic SKU (47€ per month).
If you happen to use an App Service, you can host your Function on the App Service instead of using the "Serverless" option, and have the Network Security run from the App Service.
Next, you need an APIM service. Connect the APIM Service to the same internal network as the function you want to protect, and have APIM be exposed to the Internet on the other side. Inside APIM, you can import the OpenAPI defintion from youur function (given that you made one), therefore piping the traffic from APIM to the internal interface of the function. In APIM, you can set a whole bunch of rules i will cover in a future blogpost.